Printmaking 101 Series: Sharpening Relief Printmaking Tools
Welcome, finally to the second installment of a series of skill share posts that I call the Printmaking 101 Series. Apologies for taking so long to update this series (three years!). I will be sharing some of the accumulated knowledge of over 15 years of printmaking through these posts. If you have something to add to the topic, have a question or want to correct something I’ve presented incorrectly, please do so respectfully in the comments below. I will be updating this series as frequently as I can. Thanks for joining in!
----
The biggest mistake a beginner can make is to ignore their printmaking tools. During my workshops, I get complaints of elbow and hand pain from struggling to cut linoleum and wood with their tools. This is almost always due to dull tools that are in need of sharpening and honing. There are a variety of tools in the market but they are useless if the owner doesn’t know how to sharpen them when they become dull.
Grinding & Honing.
What's the Difference?
GRINDING
When a tool becomes nicked or over polished from honing, you have to shape it back to its original form. This is called grinding or shaping and its rarely done. Grinding is a skill that takes much time and patience to master but with practice you will be able to do it.
Inspect your tools for irregularities along the cutting edge, such as notches and pits and rounded edges from using a strop. The tool is shaped with a progression of different stones or polish wheels of different grit each with a finer than the last. The number denotes the grit of the stones so for example you would start with an #100 grit and then to a #400 and finish with a progression of #1000 grits or finer. You’ll notice a small ridge of metal form on the cutting edge as you grind your tools. This is called a bur. When the bur forms on the inside of a V or U gouge, remove it with a slipstone or a properly shaped stone.
Never use a high-speed grinder to reshape linocut or woodcut blades. The heat that is generated from grinding the tools will damage and weaken the steel. There are a few tool sharpening systems in the market, namely the Tormek Work Sharp 3000. These use a wheel that has lower RPMs (Rotations Per Minute) than a grinder that would be used to sharpen a larger tool like an axe or large chisels. I recommend beginning with stones to understand the basic principles before making the investment. Also, you can get by with just using stones rather than a sharpening wheel.
HONING
Once the damaged piece of steel is removed and you’ve created a cutting edge by grinding and shaping it, you hone the edge to make it razor sharp. This process is much easier and it’s most commonly done when the tool becomes dull from use. Honing requires either a leather strop mounted on a piece of wood to stabilize it or a leather wheel and honing/stropping paste or stick. The paste is applied to the leather strop or wheel to make it slightly gritty and the tool is polished. The paste turns black from small pieces of metal becoming stuck to it as it the tool is pulled across it. It’s good practice to hone to your tools before using them or whenever they feel dull.
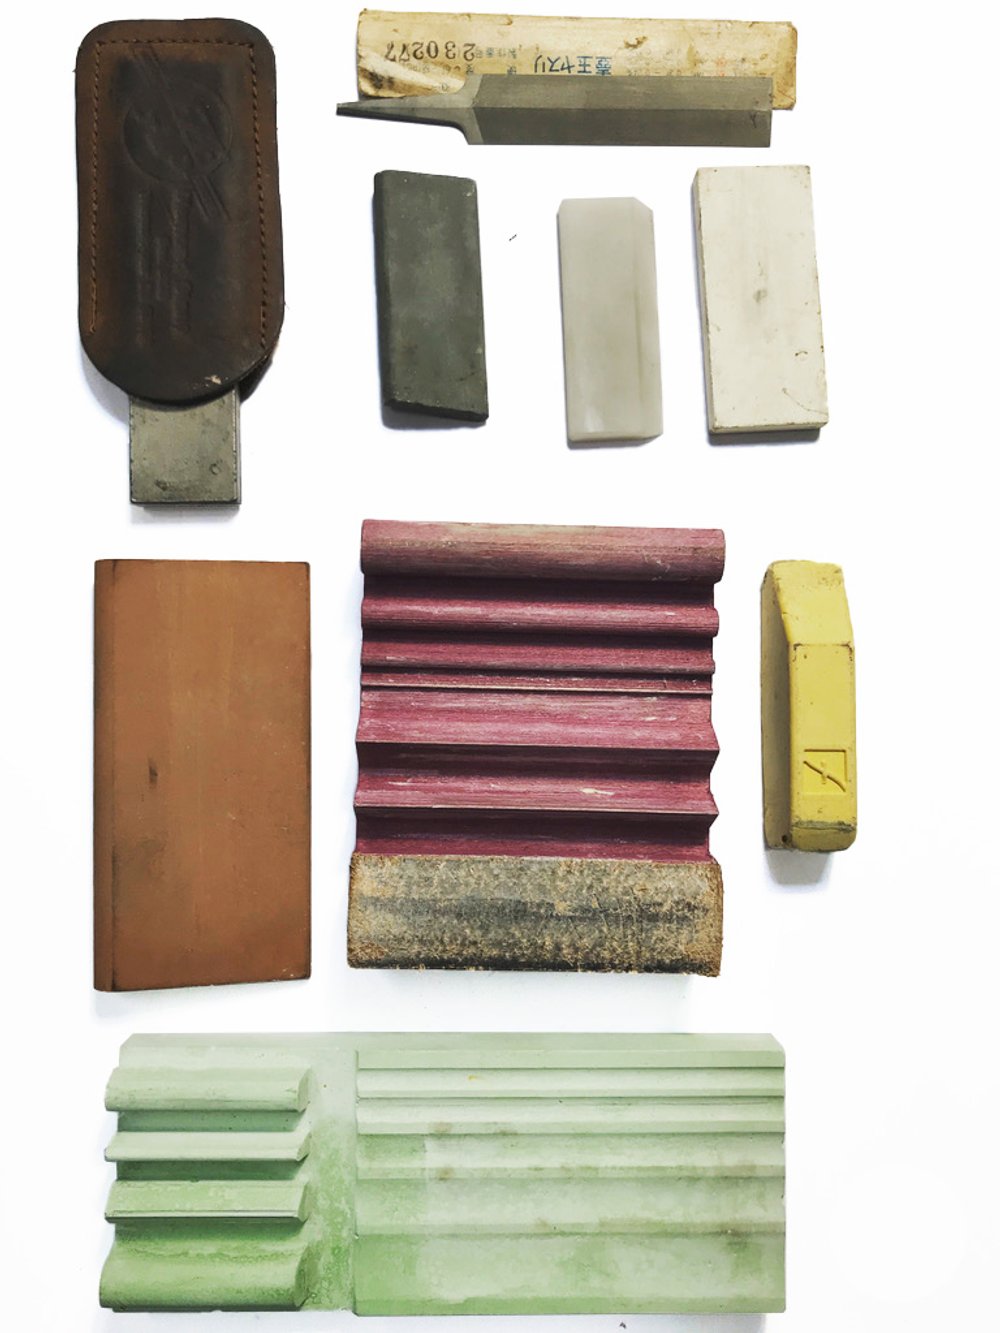
My collection of grinding and honing tools.
How To Do It
Like I mentioned before, grinding is rarely done and requires time and patience to gain this skill. I recommend that you practice using inexpensive woodcut tools to see how sharp you can get the different bevels and gouges. Once you learn how to sharpen these, you may find that these tools suit your needs.
Below is a description of the process I use shape a woodcut tool. For smaller tools, I use smaller grit so I don’t have the machine eat up the tool. Instead of a sharpening wheel, you can also use stones such as oilstones or waterstones. These are lubricated with oil or water when being used. Oilstones are the most economic but I personally prefer water stones since clean up is easy and I feel they give better results. Water stones are soaked thoroughly in water for an hour or two before use and wet frequently to keep them lubricated during sharpening.
WHAT YOU'LL NEED:
- Oilstone (#100 and #700 dual faced)
or water stones (#100, #700, #4000)
or sandpaper (#100, #400, #1200) if you use the Worksharp grinder.
- Leather strop or wheel
- Honing Paste/Stick
- Slipstone
- Oil (if using an oil stone)
- Sanding Pad Cleaner (if you are using the Worksharp 3000)
1. Once you identify that the edge of the tool is irregular and needs to be removed, take a #100 grit stone or sandpaper wheel and grind off the edge with a nick until the nick is no longer there. Do not press your tool into the wheel. Check frequently to see your progression. If you are using a stone, make sure it’s lubricated well using the appropriate lubricant. If you are using a wheel, clean the metal shavings with a sanding pad cleaner by running across the spinning wheel. To keep track of your progress, mark the edge with a permanent marker to see if you are grinding evenly.
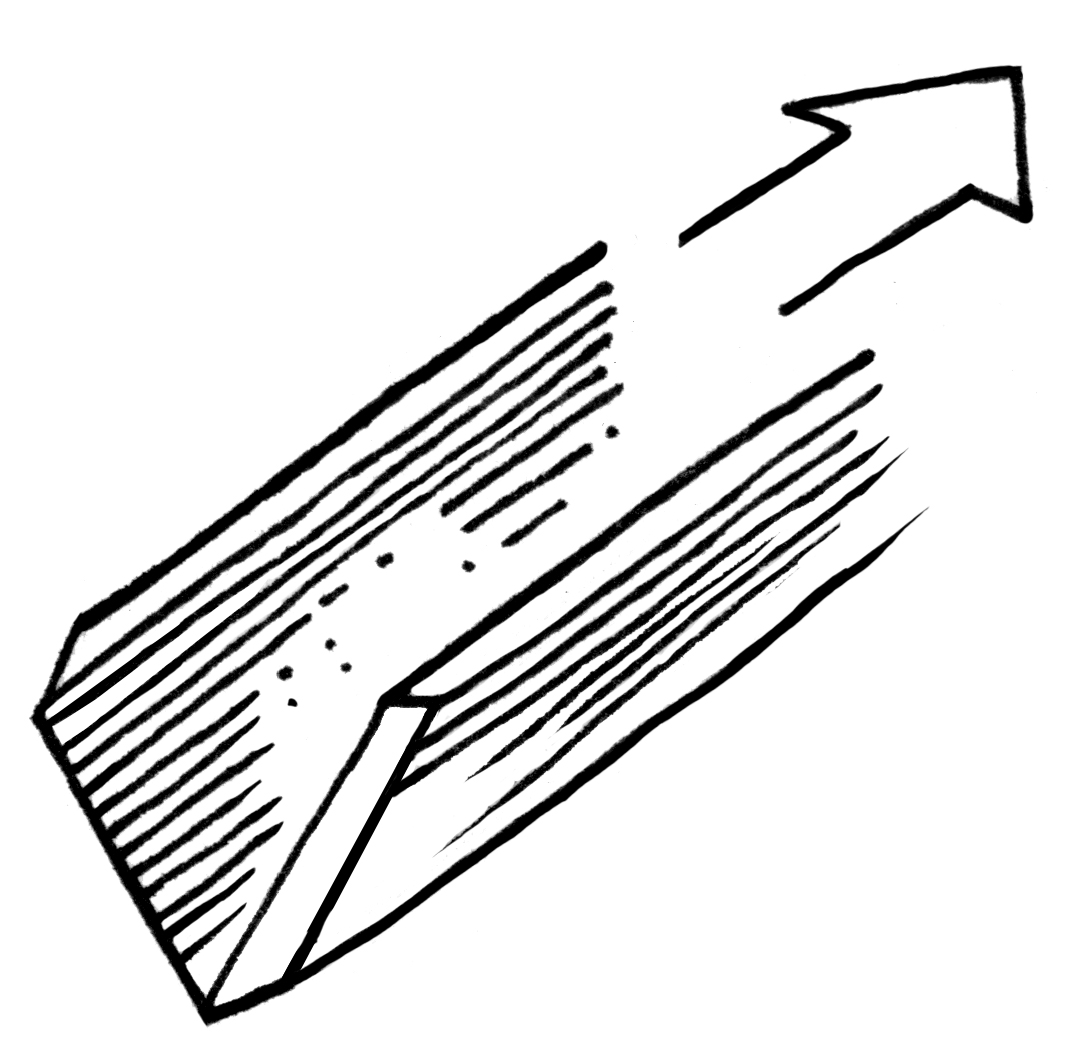
2. Reshape the blade by dragging it in one direction towards you along the surface of the stone maintaining the same angle. What you are trying to achieve is to shape the cutting edge, not sharpen it just yet.
3. To sharpen the blade, draw the tool in one direction along the stone maintaining the appropriate angle for the tool. Check the blade as you sharpen it. Use your medium grit once you reach the edge and you begin shaping the cutting edge. Finish with your finest grit, constantly checking the edge for consistency.

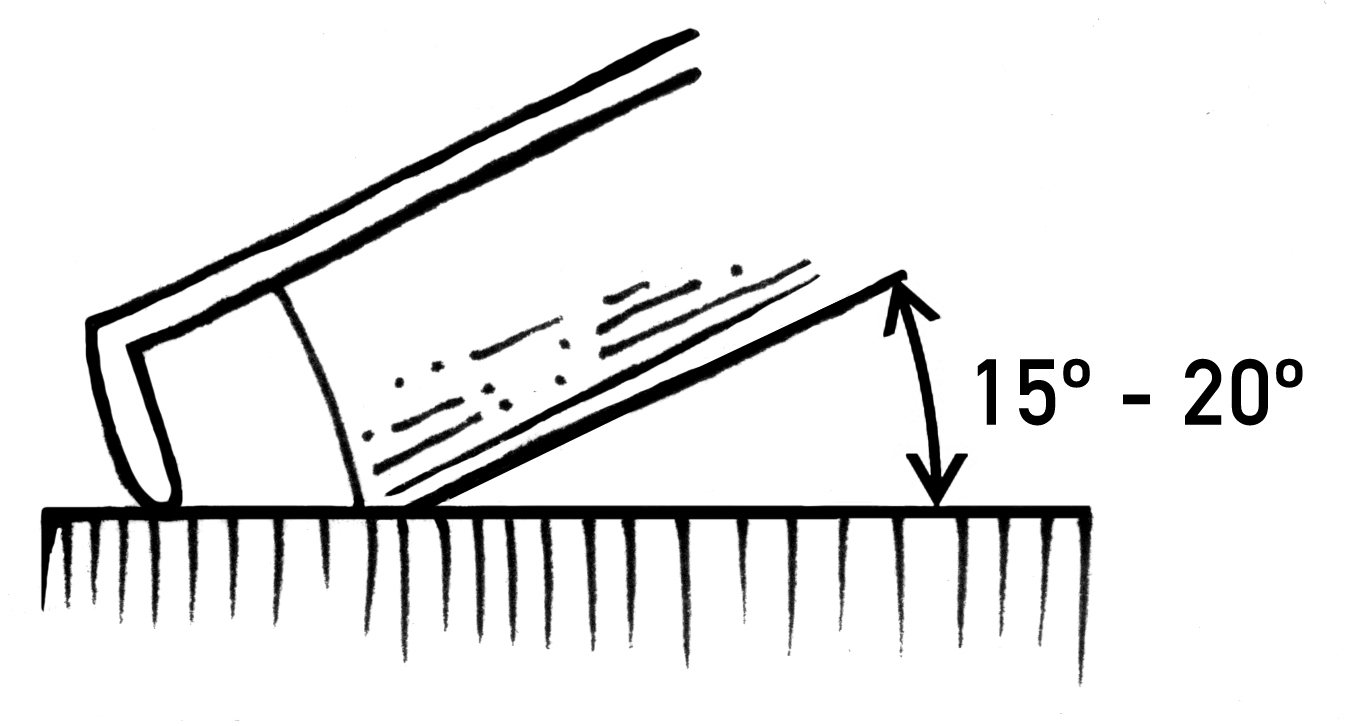
U-Shaped Gouges: If your tool is a U shaped gouge, sharpen it by rocking it steadily from corner to corner with wrist movements as you pull it towards you across the stone making sure to maintain the angle. The angle is usually 18º or 25º for hardwoods and 15º for softwoods.

V-Tool: Both sides of the tool meet at a point. Take care not to create a hook or a notch by drawing the blade unevenly on the block. Usually you want to keep an angle of 20º as you draw the blade on the stone. If you are using a stone, the motion to sharpen the blade comes from the shoulder not your wrist.


Flat Chisels: These are the most simple to sharpen. Use circular motion tilting the blade between 20º - 30º. Make sure you knock the bur that forms by running the flat side of the chisel across the stone or wheel.
TIP: Try marking the edge of the blade with a marker to see if you are sharpening the tool evenly. Reapply as many times as you need to keep track.
4. Finish by taking your leather strop or wheel and applying a small amount of honing paste or rubbing a honing stick. Draw your tool about 15-20 times on the leather checking for sharpness. The surface should look polished like a mirror. I use a sheet of bond paper to see how much resistance you need to cut the paper. The paper should cut easily if sharpened correctly. Some people use the hair on their arm to check for sharpness by running the blade across a hair and seeing if the resistance of the hair is enough for the blade needs to cut it. I wouldn’t recommend it since you can seriously hurt yourself.
It will take time and patience, but once you master this skill, your work will be all the better for it.